Tuesday, October 29, 2019

How matching transactions works to settle incoming payments from the ISO20022 camt.054 into Customer payment journal in D365FO


This blog I will explain how matching invoice works to settle the transaction of incoming payments from the ISO20022 camt.054 into Customer payment journal in Microsoft Dynamics 365 for Operations. 

There are two types of files formats we get from bank for camt.054 statement and they are.
  1. Structured(Strd)
    Information supplied to enable the matching of an entry with the items that the transfer is intended to settle, eg, commercial invoices in an accounts' receivable system in a structured form.
  2. Unstructured(Ustrd)
Information supplied to enable the matching of an entry with the items that the transfer is intended to settle, eg, commercial invoices in an accounts' receivable system in an unstructured form just like text, unstructured remittance information is limited to 140 characters.


As standard only structured formats are supported to settle the transactions automatically.

Below sequence system will try to identify the customer transactions when we import camt.054 statement
  1. Matching by Payment Id.
  2. Matching by Invoice Id.
  3. Matching by Debtor/Creditor Name.
  4. Matching by Customer bank account.
  5. Default import for all unmatched records.  

So in the process of identifying transactions if the system is not able to identify the transactions based on Payment Id/ Invoice Id then those transactions we need to settle manually after import.

Field mapping as per standard format in D365FO

S.No.
Identified field in Camt.054 file
Identified field in D365FO transactions

1

CrdtRefInf

Payment Id (CustTrans.PaymId)

2

RfrdDocInf

Invoice Id (CustTrans.Invoice)

3

Dbtr

Name (DirPartyTable.Name)

4


DbtrAcct or CdtrAcct of IBAN

IBAN (CustVendBankAccountTable.IBAN)
CrdtRefInf and RfrdDocInf info found only in structured formats. That’s why only structured formats are supported to settle the transaction by default.

What about unstructured formats if you want to auto settle?

Yes, of course we can settle them but we need to customize the format mapping to identify the invoice/ any reference to identify the transaction.

One of our client provide only unstructured formats but the invoice number available in EndToEndId tag in the file, so I have customized camt.054 format match with unstructured format to settle transaction automatically.

In this  EndToEndId  filed will be available in unstructured formats as well, so please check the file which bank provides and see if required info exists then do the mapping accordingly to work with unstructured formats.

Hope this helps you and I will come up with another interesting blog post soon.

If you need development support for any ER framework changes then reach me on Jayaprakashc079@gmail.com


#PaymentModelMappingToDestinationISO20022 , #D365 , #GER, #ISO20022Camt.054, 
#ElectrionicReporting, #CustomerPaymentImport

Sunday, October 13, 2019

How to specify a custom storage location for generated documents from Electronic reporting (ER) in D365FO


This blog guide you how to specify a custom storage location for generated documents from Electronic reporting (ER) in Dynamics 365 Finance and operations.

Generally when you generate payments, the payment file is generated, and you're asked to save it from your web browser to any available location.

Our client requirement is when they generate payments for vendors, the file should land automatically to private azure storage blob and from there our integration is configured such way that the files will be picked from blob and send it to Bank.

As we know that ER module classes locked almost and which can’t be reused or extend. But in out box Microsoft has provided API of the Electronic reporting (ER) Framework lets you extend the list of storage locations for documents that ER formats generates.

To implement the same we need to complete the below steps.¨

Ø  Setup electronic reporting destination settings
Ø  Subscribe to the AttachingFile() event in the class ERDocuManagementEvents and write business logic to save the file in desired location.


Setup electronic reporting destination settings:-

1. Document type will be setup to store the file to Azure storage.


2. Electronic reporting destination will be setup to store the file in the archive as shown below.


Then subscribe to the AttachingFile() event in the class ERDocuManagementEvents and write business logic to save the file in desired location:-

[SubscribesTo(classStr(ERDocuManagementEvents),staticDelegateStr(ERDocuManagementEvents,attachingFile))]
public static void ERDocuManagementEvents_attachingFile (ERDocuManagementAttachingFileEventArgs _args)
    {
        if (!_args.isHandled())
        {
            DocuType docuType = DocuType::find (_args.getDocuTypeId());
            _args.markAsHandled();
            var stream = _args.getStream();
            if (stream.CanSeek)
            {
                stream.Seek(0, System.IO.SeekOrigin::Begin);
            }
              //Here you can write your own desired locations where you want to save the file.
             // Else you can call C# helper class to save the file to azure blob which
            //I discussed in previous post
              JP_CloudStorageHelperClass.JP_CloudStorageHelperLocal helperClass =                                                             new JP_CloudStorageHelperClass.JP_CloudStorageHelperLocal helperClass();
               helperClass.saveFileInBlob(_StorageAccountName,Container, SASKey, BlobName , 
                                 System.IO.Stream stream)

        }
    }

For more info check Microsoft docs, Hope this helps and I will come up with another interesting blog post soon.

Happy Daxing :)

Tags
#D365, #ElectronicReportingDestinationSettings, #SaveCustomLocation, #AzureBlob

Saturday, October 12, 2019

Helper class to upload file to azure blob storage container with SASKey using C#

This blog walk thorough the helper class which help us to save file to desired private azure blob storage container using shared access signatures Key(SASKey).

using System;
using System.Net.Http;

namespace JP_CloudStorageHelperClass
{
    public class JP_CloudStorageHelperLocal
    {
        HttpClient httpClient = new HttpClient();

        //_StorageAccountName:- storage account name where you would like to save the file
        //_SASKey:- Which grant limited access to Azure Storage resources using SASKey
        //_BlobName: Name of the file 
        // _stream:- file stream you would like to drop to blob

        public Boolean saveFileInBlob(string _StorageAccountName, string _Container, string _SASKey = "", string _BlobName ="" , System.IO.Stream _stream = null)
        {
            string storageAddress = string.Format("https://{0}.blob.core.windows.net/", _StorageAccountName);

            //preparing URI to drop the file to blob
            Uri containerUrl = new Uri(storageAddress + $"{_Container}/{_BlobName}" + "?" + _SASKey);

            // which returns complete URI which is prepared in previous step
            string sasUri = containerUrl.AbsoluteUri;

            //x-ms-blob-type: <BlockBlob> - Returns the blob's type.
            httpClient.DefaultRequestHeaders.Add("x-ms-blob-type", "BlockBlob");

            // Drops the specified Uri as an asynchronous operation to blob
            HttpResponseMessage response = httpClient.PutAsync(sasUri,new StreamContent(_stream)).GetAwaiter().GetResult();

            if (response.IsSuccessStatusCode)
                return true;
            else
                return false;
        }
    }
}

This project can be referenced in D365FO project  and make use of this helper class for more details please check my previous post. of course there are direct class in X++ which can be used instead of this approach. this is just another way of doing it.

Hope this helps and I will come up with another interesting blog post soon.

Happy Daxing :)

Tags
#D365FO, #Azure, #AzureBlob, #Blob, #DropFileToBlob, #UploadFileToBlob


Thursday, October 10, 2019

Collect traces by using Trace parser for non admin users and way to download for analyzing in D365

This blog guide you how to take traces for non admin users and how it can be downloaded for analyzing further.

In this blog, I will explain how to collect and download traces for non admin users. By default user with administrator security role will have access to collect the trace as shown below.


But this option will not be available for non admin users, in case we need to troubleshoot the issue which can’t be reproduced with System Administrator role then the administrator can also grant rights to other users to take a trace.

Note: Non Admin user can only collect the trace and upload. Only Admin can download and analyse it.

Below are the sections we gonna talk about in this post to collect trace for non admin users.
  • Grant trace access to user.
  • Capture the trace and uplaod.
  • Download the uploaded traces(Only Admin user)
Grant trace access to users:- 

1. To grant a user rights to capture a trace for non admin users, go to "System administration > Users > Users".

2.  Select the user<JP> and assign the "System tracing user" role.

Capture the trace and upload:-
1. Now if you login as user <JP> (which is non admin user), will have option to collect the trace. click on it to collect the trace

2. Before you trace make sure you executed the scenario you want to trace once before you take the trace. That will prevent things like metadata loading and other possible warm up tasks from being in the trace.


3.     Name the trace that you are about to capture, and then click Start trace.

4.     Reproduce the issue/actions that need to be analysed.

5.     When you are finished, click Stop trace
    
  
6. Then, upload the trace so that Admin user can download the same and analyse it.

    Upload trace – Store the trace in the cloud for later user with system admin can download the same.


     Download Trace: - This option only available for Admin users where you can store the captured trace on a local machine. You can analyse a downloaded trace with the desktop version of Trace Parser.

     Note: If you download a trace it will not be available for later uploading, so its always suggested to upload the trace fist then download it.


Download the uploaded traces(Only Admin user):-

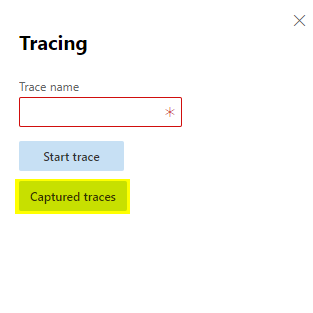
 Note: The captured traces button can only be seen by users with administrative rights and will be automatically deleted after 7 days.

1.     In the navigation bar, select Settings, and then click Trace.

2.     Click on Captured traces to view.


3. Just click on the trace name you would like to download.


Please note: The Maximum ETL file size is 1024 MB, so if your scenario takes more than 1-2 minutes it is better to try to take multiple smaller traces of 30 seconds each. it helps you to not to miss trace information and also if the file size is less then its easy to analyse.


Hope this helps and I will come up with another interesting blog post soon.

Happy Daxing :)

Tags

Dynamics 365 for Fiance and operations, #D365, #Trace, #TraceForNonAdminUser, #TraceParser , #Logs, #User, #UploadTrace, #DownlaodTrace, #CaptureTrace